Tuesday, 25 June 2013

Car Compositing Module

For this module I was required to create a photo realistically rendered BMW using Maya, Photoshop, and Nuke.

There were a few challenges for me to face with this module as I had not yet done any kind of rendering in Maya, and I had never used Nuke before, but I was excited to learn the skills and software.

After extensive research into the car, and examples of other digitally created cars in both still and film form, I practised the process of rendering with the help of Digital Tutors. Here is what I produced when following along with the tutorial:

I was quite pleased with the results and I received praise for my shaders, which I found encouraging as shaders are one of my favourite aspects of the pipeline.

Once I had become familiar with the rendering process and had received the resources, I began work on my final image. I worked quite hard to try and create accurate shaders and tweak the lighting to correctly match up with the environment, however the HDR I was given (I think) was taken at a different angle to the backplate which really threw off my reflections and shadows despite my attempts to fake a visual match.

I then took my image into Photoshop where I assembled all of the different render passes and tweaked them to make the car sit better in the environment. I added small details such as the tax disk and dirt to the vehicle to try and give it an extra layer of realism. Though the image looks comparatively cloudier than the Maya produced Master Beauty (above) I like my final results, I know there is much to improve on, but for my first attempt at rendering (and photorealistic rendering at that) I think I did quite well.

The second part of the module was to place my rendered vehicle into a piece of live action footage, this required the use of Nuke to create tracking data so that the virtual scene would match up with the movement of the live action camera.
Apparently, I did the tracking very well, but my render layers did not reassemble in as quite an aesthetically pleasing way as they did in my still composite and due to time constraints I couldn't render out all of the layers that went into the still image, which left my vehicle looking rather unconvincing. I think that if I had more time to render, and were more accustomed to Nuke then I could've made it look a lot better.
My footage was originally 5 seconds long but due to an error in the last number of frames it got cut short.

Here is my footage:


Overall, I learnt a lot from this module, I was introduced to Nuke which was something I have been anticipating for quite some time and it is something I would like to work on in the future. 
I was also introduced to the process of rendering with HDRs, which is something that seems to be catching on within the animation industry so I am glad to have learned a bit about it.

Wednesday, 13 March 2013

Digital Presentation 2

The following is from my Digital Presentation 2 module; for this module we had to choose two films/games and recreate a 10x10 meter part of the chosen film/game's set/level. One set was to be an interior and the second, an exterior.

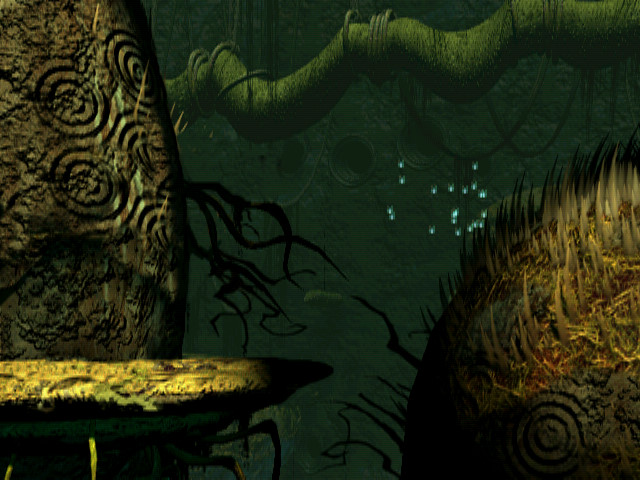
I chose two games that are very inspirational to me;  first, Oddworld: Abe's Oddysee, which I have adored since I was about 6 years old. The second game is Bioshock 2, a game that has so much depth and personality and an Art Deco style that I find very attractive.

I created the Abe level mostly in CryEngine, it was my first time using the software.

The Bioshock level was modelled and textured using Maya and Photoshop, before being exported to CryEngine and lit.

Overall, I have learned a massive amount during this module and I have discovered new skills and passions that I will definitely pursue in future. I found texture painting to be thoroughly enjoyable, and I cannot wait to learn even more about CryEngine and eventually design and construct my own levels.


Here are the original references (COPYRIGHTED TO ODDWORLD INHABITANTS AND 2K RESPECTIVELY) I used from the games, followed by my final videos and images for both of my levels (go to Youtube via the link in the video window for a better quality video).


Abe's Oddysee


Original Level:


My Final Level:


Footage:


Bioshock


Original Level:


My Final Level:


Footage:


Wednesday, 6 March 2013

Future Lifestyles- Post 7

Continuing with the Future Lifestyles work from year 2; here are the final 2 pages of my submission. These images are digital paintings I did using George Harris' rendered model as a base, I'm really pleased with these paintings and wish I had time to do more.


Wednesday, 27 February 2013

Future Lifestyles- Post 6

Continuing with the Future Lifestyles work from year 2; these pages look at the docking system of the ship and how the interiors have been structured accordingly.


The sub-team I collaborated with did a fantastic job of working creatively with the concepts I had produced, George Harris, who modelled the ship, came up with the solution for the propulsion of the ship- a problem we had been experimenting with for a time. All credit for the page below goes to him, I just wanted to put together an explanatory sheet to inform my future pages.


Wednesday, 20 February 2013

Future Lifestyles- Post 5

Continuing with the Future Lifestyles work from year 2; here marks the beginning of my work on the vertical ship that I carried out with a (much more successful) sub-team.

It is a great shame for me that the sub-team and the subject matter came together at such a late stage as I really feel that my best work during the module was on this part and I thoroughly enjoyed working on it.


Wednesday, 13 February 2013

Future Lifestyles- Post 4

Continuing with the Future Lifestyles work from year 2; these pages focus on the island itself once again, looking at what possible materials it can be made from in the future.


Wednesday, 6 February 2013

Future Lifestyles- Post 3

Continuing with the Future Lifestyles work from year 2; in these images, I worked on the architecture for the more residential areas of the marine research facility.